You've chosen itemit as your asset tracking software, congratulations! You're one step closer to saving a lot of time and money. Once you're set-up, you'll quickly find your processes are a lot more streamlined. The increase in efficiency is entirely thanks to our smart asset tags and our asset management system.
So, how do you add assets, and how do our asset tags work?
The system works whether you're using our QR Code asset tags, whether they're bespoke and customised or if they're standard, and our RFID tags. When we roll out the ability to use GPS asset tags, the system will work the same, too!
Adding Assets
Adding an asset is a simple process. Whether you're in the web portal or if you're using the app.
Thanks to itemit's flexible asset tracking capabilities, to add an asset, all you have to do is press the blue plus in the bottom right in the app.
You'll then get taken to a page which will require you to add asset information.
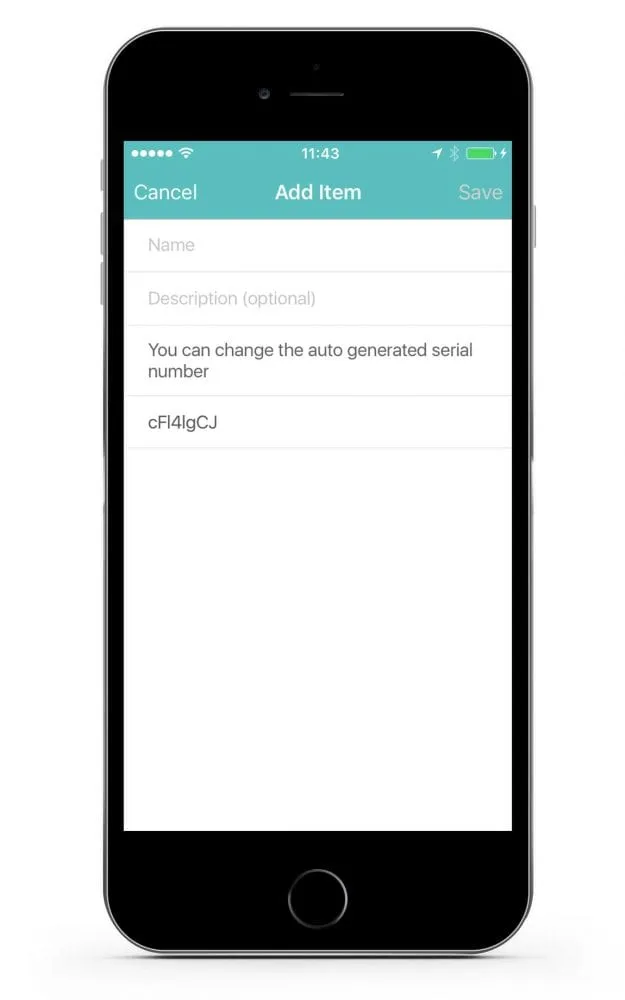
Firstly, you'll need to add the name of your asset, and then you can add an optional description too. You can choose anything. If you and your team will find it easier to know which fridge they're looking at by adding a description that says "louder than a rattlesnake" then that can be your description!
You can also add a unique serial number if you're tracking your assets this way to help complement the process, or you can use our auto-generated one.
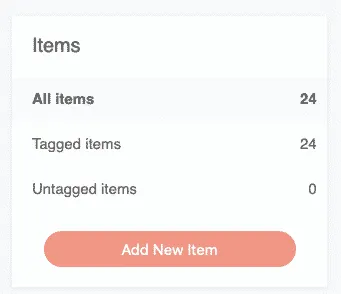
The process on our web portal is the same. You just have to press the "Add New Item" button on the left instead.
At itemit, we also run an import service. If you've decided to ditch the spreadsheets and move on to a more comprehensive and streamlined asset tracking system, we can import your asset data for you.