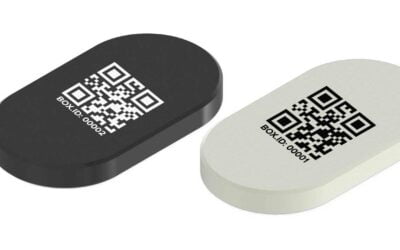
When you’re looking at asset tagging and management, you need to know that the process is quick and simple to set up. You need to look into how much you can tailor your asset information to your use case, too.
With these in mind, you’ll be able to create efficiencies and processes when you’re setting up your system. However, where do you begin? How do you start using an asset tagging and management system?
We’ve written a step by step to show you how simple it should be to use your asset management system!
1. Tag Your Assets
First of all, you’ll want to tag your assets with asset tags. Asset tags are stickers, likely a QR code or barcode, that contain unique data. The fact that this code is unique is so that the code can correspond to a unique asset.
In other words, each of your laptops will need unique information. If one laptop needs maintenance, they don’t all need maintenance, so you need to be able to find that unique asset quickly to report any issues.
So, with the use of asset tagging and management, you’ll be able to use these tags to find your assets in your asset tracking software simply by scanning them.
2. Log Your Assets In Your Asset Tracking Software
This can be done in a few ways. As your assets will have been tagged, the fastest way to do this is to scan the tags and create an asset from there.
In other words, you’ll be able to scan an unassigned tag and will receive a popup asking you if you’d like to create an asset. When you create that asset, the same tag will be assigned to it.
If you already have an asset register an import service will also be possible. This will involve a consultation and clean up of your data to ensure that it matches up. If your assets already have tag data, this can also be imported!
3. Add Asset Data
After you’ve logged your assets, you will be able to start adding data to them. This can be check in check out data, issues, purchase prices and information, PO numbers, invoices and more!
The idea is that any data you need to know about your assets is logged, visible, and usable. Visibility is critical here as you don’t have much visibility when using a spreadsheet. Searching and pinpointing asset information is almost impossible when it’s confined to one cell on an entire spreadsheet.
When you’re adding asset information, you can also add assignees to show who is responsible for your assets or add them to locations to show where they are in your business.
4. Run Audits On Your Assets
Finally, you’ll be able to combine all of this to run speedy, simple audits on your assets. As all of your asset data will be pulled into a fixed asset register, you will be able to use this to view and filter your information.
This can then be exported as a pdf or excel sheet for insurance or tax purposes, among other things. Overall, this process is created through the work you’re doing daily anyway while also mitigating the risk of ghost and zombie assets.
You can also use your assets’ tags for audits. All you’ll need to do here is open your asset tagging and management app, click on the audit feature, and scan your assets’ tags to indicate that everything is where it should be.
To find out more about how itemit’s asset tagging and management system can help your business save time and save money, you’ll be able to contact the team at team@itemit.com. You can also fill in the form below to start your 14-day free trial.
Asset Tagging And Management
Choose a better way to track your assets
Start your free 14-day trial now
Instant access. No credit card details required.
Related articles
What Digital Asset Management Is?
Digital asset management is one of the vital tools for any business in this digital age. Understanding what DAM is can transform how organisations handle their digital files, which may range from images and videos to documents. A sustainable DAM system will ensure efficient storage, organisation, and retrieval of assets. This article will look at the basics of digital asset management and its advantages.Understanding What Digital Asset Management IsWhat is a digital asset management system? It...
What is an IT Asset Register?
In this guide: 1. Definition of IT Asset 1.1 What Are the Different Types of IT Assets? 2. What is IT Asset Management? 3. What is an IT Asset Register? 4. Why Should You Track Your IT Assets? 5. What Should Be Included in Your Asset Register? 5.1 IT Hardware Tagging 5.2 Description of the Assets 5.3 Purchase Information 5.4 Location Information 5.5 Onboarding New Staff 5.6 Create a Fixed Asset Register 5.7 Lifecycle and Depreciation 5.8 GDPR Compliance 5.9 Security and Access Controls 5.10...
The Benefits and Drawbacks of BLE Tags for Asset Tracking
Many industries face a real challenge in keeping track of valuable assets. Asset tags have emerged as a solution for tracking and managing valuable assets. Among the different technologies, BLE tracking tags score over others for many reasons. The article will discuss the pros and cons of BLE tags in asset tracking and how they increase operational efficiency and security.Asset Tracking Bluetooth: Understanding Technology and Its ApplicationBLE has changed the face of asset tracking with...


